

I have been thinking about making homemade Oreos for years now. The reason I dragged my feet was because the filling called for shortening. When I was growing up I used to use shortening to make chocolate chip cookies. The shortening made thicker, crispier cookies. Then I started to use half shortening and half butter so they spread a tiny bit more. Then as the years went on, I learned about trans fats and stopped using shortening all together. These days the trans fats are out of vegetable shortening (or at least the trans fats that companies are required to report), so I figured I’d try these cookies once and for all. I bought some Spectrum Organic Shortening and off I went.
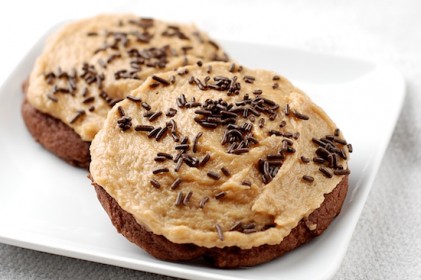
These cookies taste surprisingly like the Oreos you buy in the supermarket. They’re excellent. My boys would have eaten the whole batch in one sitting if I let them. They really loved that I made the filling orange for Halloween.
I made these with a small ice cream scoop so all of the cookies would be roughly the same size. You want to make sure that you flatten the cookies a bit before they cook. They spread a bit, but not tremendously.
The filling is very stiff. I used a pastry bag to fill the cookies. Once you put the filling in the center of a cookie, put the top on and gently rub the cookies together until the filling is spread evenly through the cookies. The recipe calls for Dutch-process cocoa powder. I only had regular cocoa powder, so I used it. The cookies were still delicious.
Have fun with these. I envision mint filling during the Christmas holidays and all different colored filling for the various holidays throughout the year.
Homemade Oreos
Recipe from Smitten Kitchen who adapted it from a book called Retro Desserts by Wayne BrachmanFor the chocolate wafers:
1 1/4 cups all-purpose flour
1/2 cup unsweetened Dutch process cocoa
1 teaspoon baking soda
1/4 teaspoon baking powder
1/4 teaspoon kosher salt
1 cup sugar
1/2 cup plus 2 tablespoons room-temperature, unsalted butter
1 large eggFor the filling:
1/4 cup room-temperature, unsalted butter
1/4 cup vegetable shortening
2 cups sifted confectioners’ sugar
2 teaspoons vanilla extractSet two racks in the middle of the oven. Preheat to 375°F.
In a food processor, or bowl of an electric mixer, thoroughly mix the flour, cocoa, baking soda and powder, salt, and sugar. While pulsing, or on low speed, add the butter, and then the egg. Continue processing or mixing until dough comes together in a mass.
Take rounded teaspoons of batter (or use a small ice cream scoop) and place on a parchment paper-lined baking sheet approximately two inches apart. With moistened hands, slightly flatten the dough. Bake for 9 minutes, rotating once for even baking. Set baking sheets on a rack to cool.
To make the cream, place butter and shortening in a mixing bowl, and at low speed, gradually beat in the sugar and vanilla. Turn the mixer on high and beat for 2 to 3 minutes until filling is light and fluffy.
To assemble the cookies, in a pastry bag with a 1/2 inch, round tip, pipe teaspoon-size blobs of cream into the center of one cookie. Place another cookie, equal in size to the first, on top of the cream. Lightly press, to work the filling evenly to the outsides of the cookie. Continue this process until all the cookies have been sandwiched with cream.
Yield: ~2 dozen sandwich cookiesOne year ago: Creamy Curried Celery Root Soup
Two years ago: Mini Nutella Cakes
Three years ago: French Toast
Four years ago: Quick Oat Bran and Banana Muffins
 Print This Recipe

Can you mail some to MA?! please!
Sure! They’re really delicious.